
Most people first meet a ground-glass joint in the context of a finished piece of equipment: a condenser, a round-bottom flask, an adapter pulled from a drawer. The joint looks complete and inevitable, as if it has always existed in that shape.
But a ground-glass joint is not a given. It is something that has been formed, ground, corrected, checked and heated before it ever reaches your bench. To understand why some joints rotate with a soft, confident feel—and why others leak, grind, or seize—it helps to follow the joint back to where it begins.
How Ground-Glass Joints Are Made: From Glass Tubing to a Finished Joint
Process at a glance
Every joint begins as a simple length of borosilicate tubing. Someone has to decide where on that tube the joint will live, and what kind of body will carry it: a socket on a condenser, a cone on a flask, a sidearm on a distillation adapter.
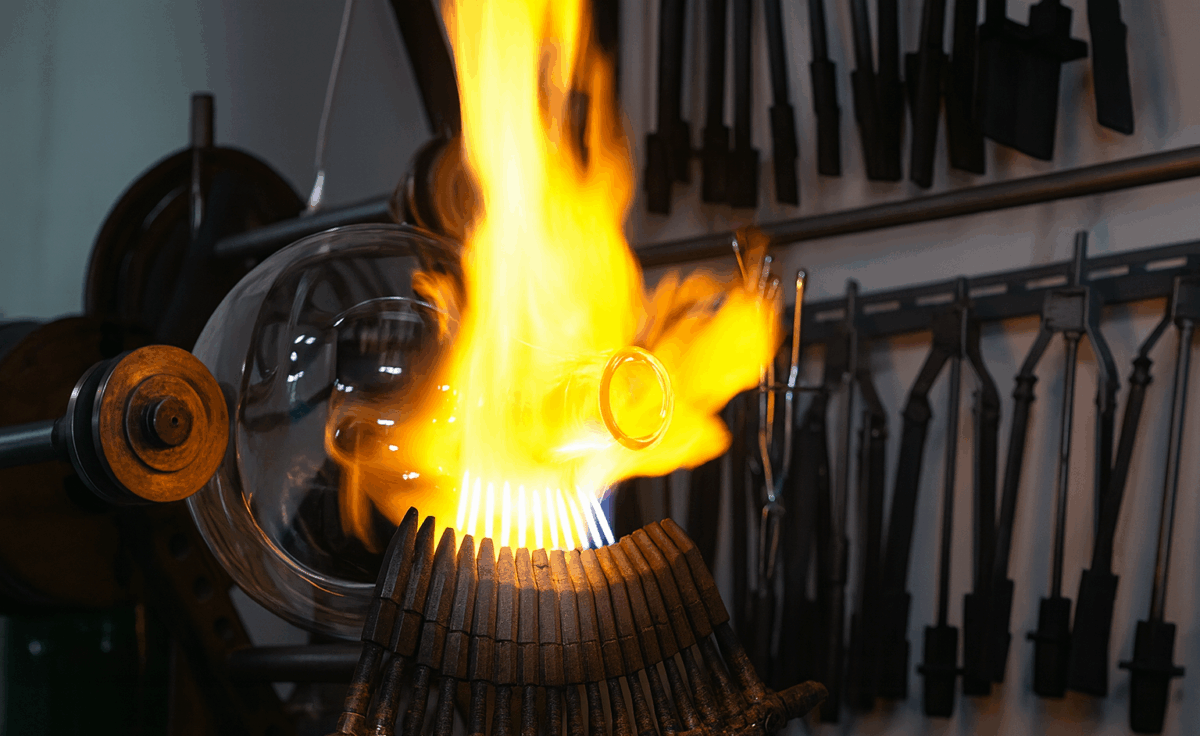
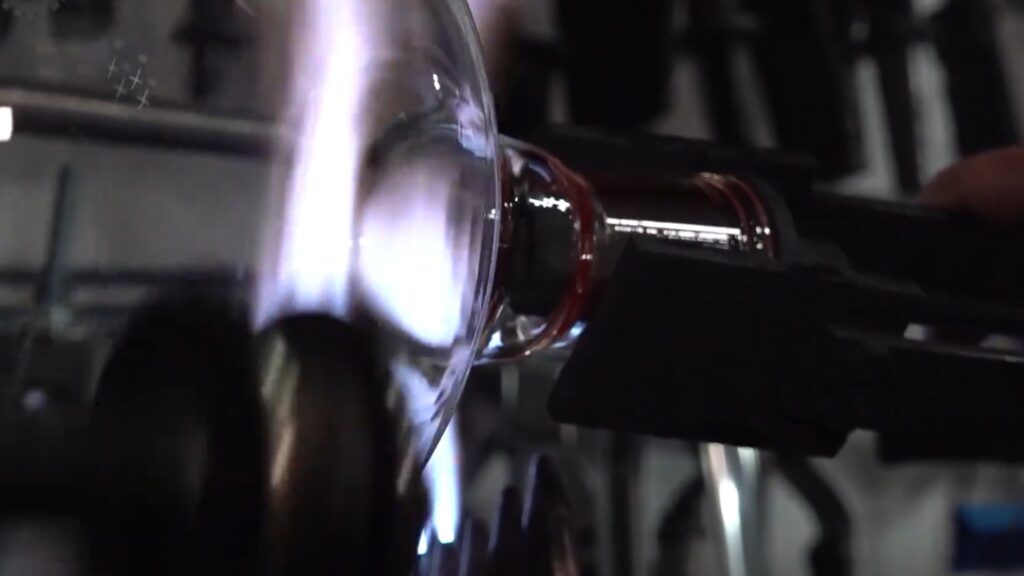
At the forming stage, a lampworker or forming specialist heats and shapes the glass. On a lathe, the tube turns slowly in the flame while tools coax it into shape. At a hand torch, the glassblower builds up a more complex piece step by step. The goal here is quiet but strict: the part of the glass that will become the joint must be straight, centered and aligned with the rest of the piece. If this is wrong, a later grinding machine can still cut a perfect 1:10 taper—but that taper will sit crooked, and you will feel it every time you assemble the apparatus.
Once the body is ready, the joint blank moves to grinding. In many scientific glass factories over the past few decades, the philosophy has been simple: let the machines define the geometry, and let human hands perfect the seal.
The first machine pass is a coarse grind. Most of the excess glass is removed and the familiar 1:10 taper starts to appear. Diameters move toward their target values, and gauges or reference tools begin to come out. A second, finer pass then refines this taper and nudges the joint firmly into the tolerance band required for interchangeable glassware. After these two passes, the joint is, on paper, “correct”: it has the right taper angle, the right length, the right diameters at the reference points. It will fit into any other joint of the same nominal size.
What it does not yet have is character. The surface may still carry tiny high spots, faint circles or spirals from the grinding path, and a texture that is technically within spec but not yet pleasant to use. This is where machines hand the work back to people.
A specialist whose job may be almost nothing but joints takes over. A small amount of fine abrasive—silicon carbide or diamond—is introduced. Using a master gauge or a trusted mating joint, the worker searches for those minute irregularities the machine left behind. The pressure is light, the motion controlled. The aim is not to carve a completely new geometry, but to push this already-interchangeable joint toward the best version of itself: more even contact, smoother rotation, fewer opportunities for leaks.
This is very different from the old practice of grinding one specific male and one specific female together until they only worked perfectly as a pair. Here, the standard is still interchangeability. The joint must continue to fit any matching size from the same line. Hand finishing simply makes that fit more forgiving and more reliable.
Behind the scenes there is another layer of specialization. In many factories, one person or one team focuses on semi-finished joints: they pre-shape the taper, run the coarse and fine machine passes, and carry out the final hand finishing. Their output is a box of joints that are dimensionally correct, well behaved, and ready to be attached to something. Those semi-finished joints then make their way to the lampworker’s bench. The lampworker does not “fix the joint”; they decide how it lives inside the final instrument—at what angle, at what height, and with how much stress locked into the glass around it. A good adapter or condenser is therefore a collaboration: the taper you feel between your fingers is the work of the joint grinder, and the way that taper lines up in the apparatus is the work of the lampworker.
After grinding and forming comes cleaning, inspection and annealing. Abrasive residues must be removed, both for safety and to prevent further uncontrolled wear. Dimensions and taper are checked again. Finally, the piece passes through an annealing cycle that relaxes internal stress. Only then is the joint truly ready to face heating, cooling and mild vacuum in someone else’s lab.
How to Fix Common Ground-Glass Joint Problems in Everyday Lab Use
All of this factory work collapses, at the bench, into a few very simple questions: does this joint seal, does it turn smoothly, can I trust it in a setup that matters? The answers still come from the way the joint was formed, ground, finished and annealed—but in everyday use you mostly meet those decisions as small annoyances: a joint that always needs more grease, a condenser that tends to weep under mild vacuum, a flask that never quite feels “right”.
One of the main places where this shows up is the surface texture of the taper. A machine-ground surface, especially one produced with fixed-abrasive diamond wheels, tends to have directional marks: faint rings, shallow spirals, very fine ridges. When the process is well tuned, these marks are shallow and regular enough that they behave well. When it is not, they can become tiny leak paths, especially under vacuum, like microscopic threads running through what ought to be a seal.
Hand finishing breaks up this pattern. By removing small high spots and introducing a more random, finely frosted texture, it increases both the effective contact area and the tolerance of the joint to small imperfections. This is why two 24/40 joints can both be interchangeable and technically “within spec”, yet one feels immediately trustworthy and the other demands more grease, more force and more patience.
You can sense a lot of this with your own eyes and fingertips—how even the frosting looks, how clean the rim is, whether the taper feels straight when you sight along it, whether the joint seats with a quiet, controlled turn or with scratchy, hesitant movement. In Part 1 of this series we looked in detail at how to judge a good joint at a glance. Here, we will stay closer to the production side and look at what you can safely do at the bench when a joint is “almost good enough”, but not quite.
Factory-style fixes you can safely do at the bench

There are a few small, very controlled adjustments that borrow directly from factory practice. They will not turn a truly bad joint into a good one, but they can gently push borderline pieces back into the “reliable enough” category for routine work.
The first is the one that feels most like bringing the final finishing step back to your bench: using an extremely light lapping action to refine the surface.
PRACTICAL LAB TIP
Reviving a “tired” ground-glass joint
In everyday lab life you may inherit older glassware, or combine pieces from different manufacturers, and discover that a particular pair of joints always seems to be on the edge of leaking. If there are no cracks, no serious chips and no obvious distortion, you can sometimes improve their behaviour with a very gentle hand-lapping step.
How to do it:
- Use a fine or extra-fine valve-grinding or lapping paste.
- Apply a tiny amount to the taper.
- Seat the matching joint and rotate slowly with light pressure.
- Clean both pieces thoroughly to remove all abrasive, then test the fit.
The goal is to refine the surface, not to change the size or the taper angle. This kind of user-side lapping can help slightly worn or mixed-brand joints become more reliable, but it will not save joints with cracks, deep chips, badly distorted geometry or hidden stress — those are better retired than “rescued”.
A closely related trick is to deal with shiny, polished patches that sometimes appear on older joints. After years of use, grease and cleaning, a small area of the ground surface can become almost clear again. Under vacuum, that bright patch tends to behave like a tiny leak-prone island.
If the glass is otherwise sound, you can treat just that area with the same kind of very fine lapping paste, working gently over the whole taper so you do not create a step. The aim is not to “regrind” the joint, but simply to bring the surface back to a uniform, fine frost so the contact pressure redistributes. Once the bright spot has disappeared and the texture looks even again, you stop, clean thoroughly, and test. Very often, that is enough to move a marginal seal into the dependable range for routine work.
There is one more adjustment that comes straight from how glassworkers think about stress. A tiny chip right on the outer rim of a joint is more than a cosmetic flaw: it is a classic stress concentrator. In the factory, sharp edges are often given a slight chamfer to keep cracks from starting there.
At the bench, for very small chips at the outer edge only, some glassworkers will use a fine diamond file or stone to put the slightest, smooth radius on the damaged spot. The goal is again not to make it pretty, but to soften a razor-sharp edge into something less likely to grow into a larger crack the next time the glass is heated or knocked. This kind of micro-chamfer is only worth attempting on superficial damage far from the sealing area, and only for non-critical work. Anything deeper, closer to the ground surface, or associated with visible cracks is better retired than repaired.
These factory-style tweaks live right at the border between manufacturing and everyday use. If you are mainly worried about how to live with ground-glass joints in daily lab work—how to clean them without polishing the surface away, when and where to use grease, and what to do when a joint has seized completely—those belong to a different part of the story. On ChemNorth we cover those questions in two separate, practical guides:
- How to Use and Clean Ground-Glass Joints Without Damaging Them
- How to Prevent and Release Stuck Ground-Glass Joints Safely
Together, these small, factory-style adjustments sit in a narrow but useful space: they do not turn a fundamentally bad joint into a good one, but they can nudge a borderline piece back into the “reliable enough” category for everyday tasks—while the detailed “user-side” handling lives in those dedicated how-to articles.
Key Takeaways for Choosing and Using Ground-Glass Joints
If you prefer to think in checklists, you can summarize a good joint’s story in a single line:
formed straight → ground to the right taper → hand-finished for behaviour → cleaned, inspected and annealed → welded into the final piece without bending it
When you pick up a well-made joint, all of that is already behind you. What you are left with is the experience at the bench:
- some joints seal beautifully with very little grease;
- some grind, seize or leak even though the markings on the glass look right;
- some pieces from high-end suppliers feel strangely “calm” in the hand compared with budget sets;
- some joints survive years of heating and cooling, while others crack when pushed only a little.
None of this is random. It is the accumulated result of choices made at each stage from glass tube to finished joint.
In the first article of this series, we looked at why ground-glass joints are everywhere in organic labs and how to judge a good joint at a glance. In this second part, we have followed a joint back through forming, grinding, hand finishing and assembly to see how it becomes what it is.
The next natural question is about the numbers you see etched on the glass:
what do 14/20, 19/22 and 24/40 actually mean, and how should you think about size when you choose or design a setup?
That is the topic of the next article in this series.
👉 Read the next article:
Understanding Ground-Glass Joint Sizes: What 14/20, 19/22, and 24/40 Really Mean